Plesk is the leading WebOps hosting platform to run, automate and grow applications, websites, and hosting businesses. Being the only OS agnostic platform, Plesk is running on more than 430,000 servers, automating 12M+ websites and 16.5M+ mailboxes. Available in more than 32 languages across 140 countries, 50% of the top 100 service providers worldwide are partnering with Plesk today.
Plesk has simplified the life of SysAdmins and SMBs since the early 2000s and continues to add value across multiple cloud services. The Plesk hosting platform effectively enables application developers by providing access to a simple and more secure web infrastructure managed by web pros and hosting companies.
This guide will carry you through the following steps:
- CSR Generation in Plesk
- SSL Installation in Plesk
1. CSR Generation:
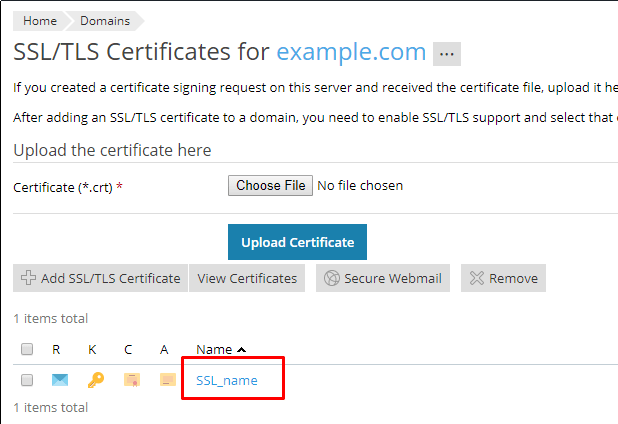
- Login to Plesk and go to Domains > example.com > SSL/TLS Certificates
- Click Add SSL/TLS Certificate
- Specify the certificate parameters:
- Certificate name: This will help you identify this certificate in the repository.
- Bits: Choose the encryption level of your SSL certificate. In Plesk Onyx, 2048, 3072 and 4096 bits are available.
- Country, State or province, location (city), organization name (company): The values you enter should not exceed the length of 64 symbols.
- The domain name: This should be the name for which you want to purchase an SSL certificate. It should be a fully qualified domain name. Example: example.com.
- Email: It should be the website administrator’s email address.
- Make sure that all the provided information is correct and accurate, as it will be used to generate your private key.
- Click Request. Plesk will generate your private key and certificate signing request (CSR) and add them to your certificates repository (Domains > example.com > SSL/TLS Certificates).
- Now that the CSR has been generated, provide it to the chosen Certificate Authority to purchase a certificate from them. In the list of certificates in Domains > example.com > SSL/TLS Certificates, click the name of the certificate you need.
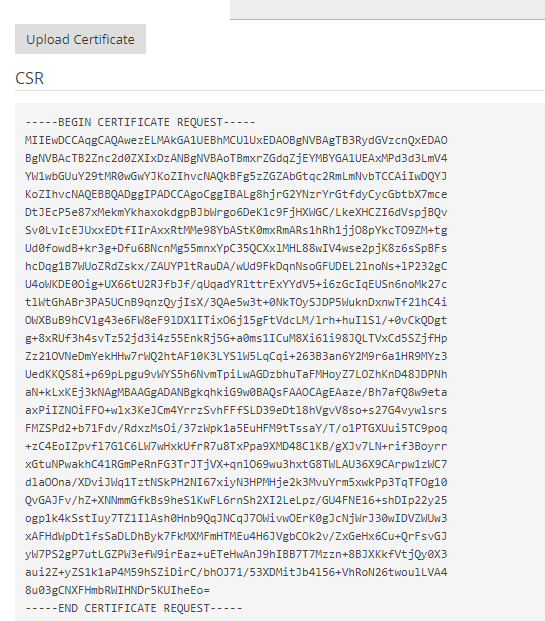
- Locate the CSR section on the page and copy to clipboard text that starts with the line —–BEGIN CERTIFICATE REQUEST—– and ends with the line —–END CERTIFICATE REQUEST—–.
- Provide the CSR to the Certification Authority while purchasing the certificate. The exact procedure differs from one Certificate Authority to another, so contact the Certificate Authority for assistance. Once the purchase is completed, you will be given the certificate in the form of either a *.crt file, a *.pem file, or in text form.
2. SSL Installation
- Log in to Plesk.
- Go to Domains > example.com > SSL/TLS Certificates > Advanced Settings.
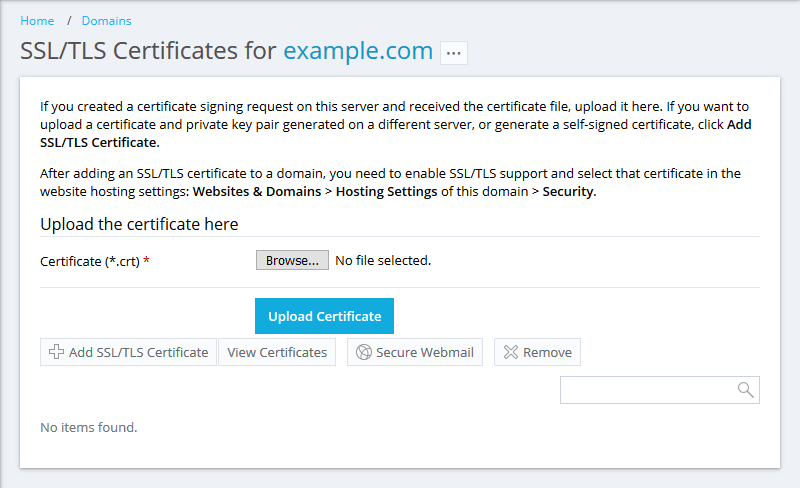
- On the SSL/TLS Certificates page, add your certificate:
Note: If you are experiencing issues with a certificate installation, contact your certificate seller and ask for certificate installation instructions for Plesk.- If an SSL certificate is stored in a single *.crt file:
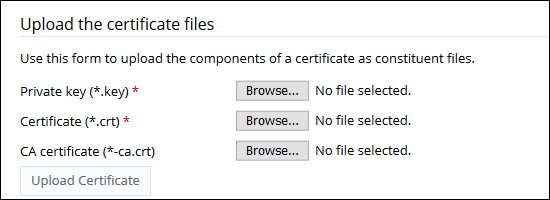
Click Browse… to select a certificate file. Then click Upload Certificate. - If an SSL certificate is stored in the form of *.key and *.crt files, Click Add SSL/TLS Certificate and scroll down to the Upload the certificate files section and upload these files.
- If both the certificate and the private key parts of your certificate are contained in a *.pem file (you can check it by opening the *.pem file in any text editor), just upload it twice, both as the private key and the certificate. Click Upload Certificate once finished.
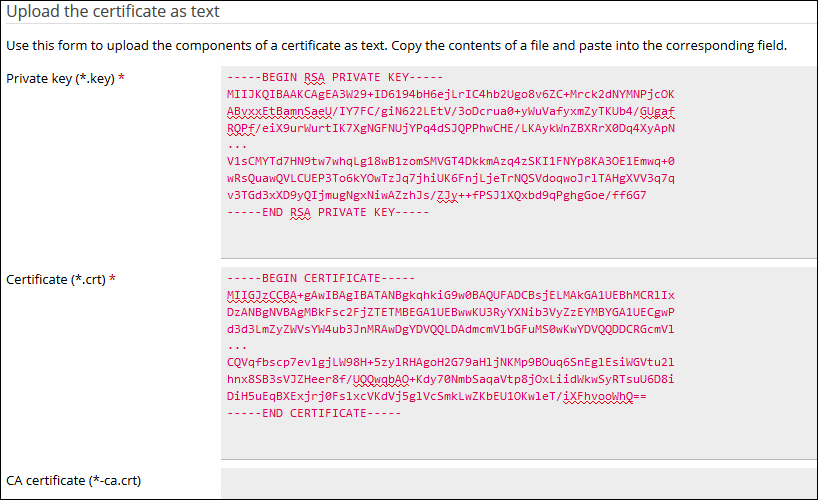
- If an SSL certificate is stored as a text, Click Add SSL/TLS Certificate and scroll down to the Upload the certificate as text section. There, paste the certificate and the private key parts into the corresponding fields. Click Upload Certificate when you have finished.
- If an SSL certificate is stored in a single *.crt file:
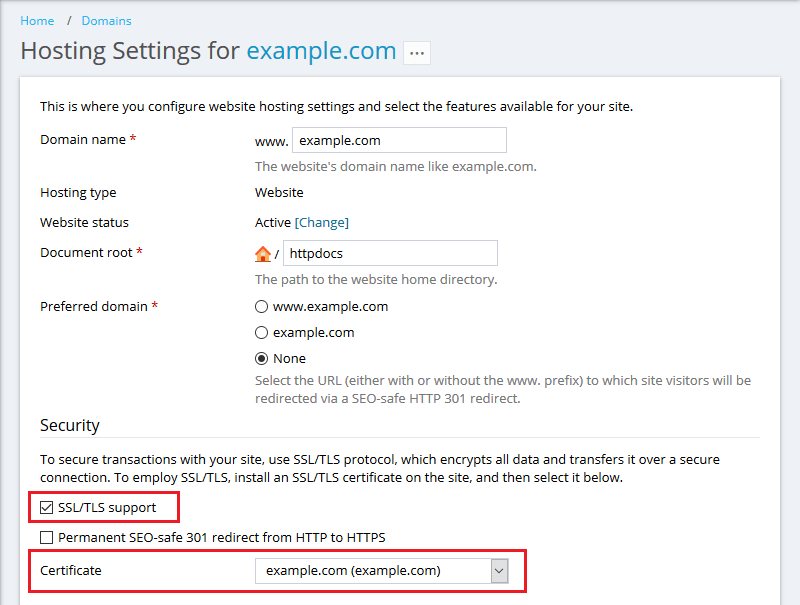
- Once the certificate is created, go to Domains > example.com > Hosting Settings, enable SSL support and select your created SSL certificate and then click OK.
- Once done, try browsing your website with https.
If you are unable to use these instructions for your server, Acmetek recommends that you contact either the vendor of your software or the organization that supports it.
