 These SSL Installation instructions are based from using the Digicert Certificate Utility to generate the CSR keypair. For a recap of those instructions visit article FileZilla – CSR Generation Using Digicert Certificate Utility
Readying your FileZilla SSL Certificate to be installed into your FileZilla system using the Digicert Certificate Utility:
After you have enrolled for your SSL Certificate using a CSR generated from the utility you will then have to Import/Install the SSL Certificate after it gets issued back into the Digicert Utility. The CA should give you a pkxs7 format certificate also known as a .p7b. The way they give you this certificate will vary.
If your CA gives supplies the pkcs7 format SSL Certificate in the body of the email perform he following.
- Copy the SSL certificate and make sure to copy the —–BEGIN CERTIFICATE—– and —–END CERTIFICATE—– header and footer Ensure there are no white spaces, extra line breaks or additional characters. Use a plain text editor such as Notepad, paste the content of the certificate and save it with extension .p7b (When performing this on a Windows system the Icon of the file should change into a certificate icon)
- Save and move this .p7b file to the system where you have created the CSR using the Utility on.
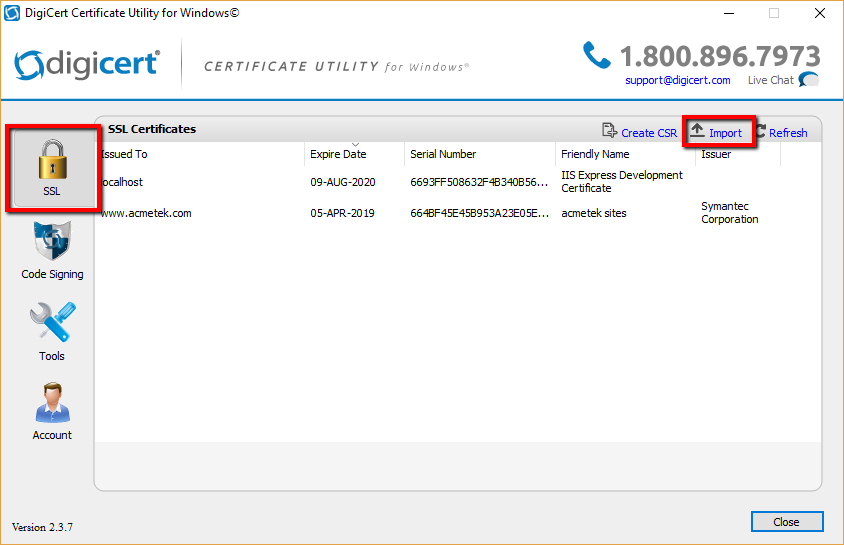
To complete and install your SSL Certificate perform the following.
- Run the Digicert Certificate Utility by Double-clicking the DigicertUtil.exe.
- In the Digicert Certificate Utility, Click SSL.
- Click Import.
- In the Certificate Import window click Browse.. and Open to specify the location and path of your SSL Certificate.
Note: In the browse window change the file type to either PKCS#7 Certificates (*.p7b) or All Certificate Types (.pfx, .p12, .cer, .crt, .p7b) from the drop down to find your certificate.
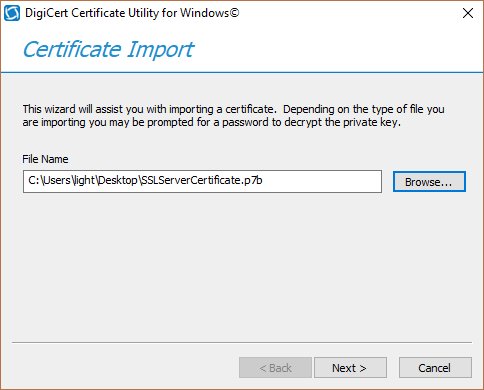
- After specifying the location and path of the file click Next.
- You will see information about the certificate you have selected to import. In the Enter a new friendly name or you can accept the default field type a friendly name for the certificate. Something unique so that you can quickly identify this certificate.
- Click Finish.
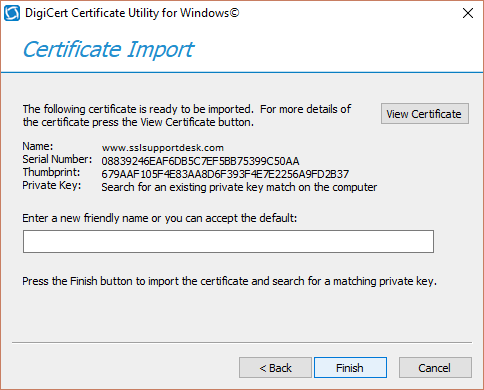
- You should get confirmation that the certificate has been successfully install and see it within your list of code signing certificates.
Note: If you get an error that states “Private Key Missing” this is due to the following causes…- You did not create the CSR/Private key on this machine:
Resolutions:- Make sure you are on the correct system that has the Digicert Certificate Utility installed where you generated the CSR from.
- If you lost your private key or if the system where the CSR was generated using the Utility blew up then you will have to start from scratch by generating a new CSR, and performing a reissue/rekey of your SSL Certificate.
- You are installing the a wrong certificate:
Resolutions:- Make sure you are installing the correct certificate. Typically once the certificate is on your desktop as a .p7b file you can double click on it to read the information. make sure the certificate or one of the certificates in its chain is issued to your organization with the correct dates.
- You did not create the CSR/Private key on this machine:
Congrats you have just configured your SSL Certificate using the Digicert Certificate Utility for SSL now you will export the certificate in an Apache format using the Utility and install the certificates into FileZilla.
Exporting your SSL Certificate from the Digicert Certificate Utility in Apache pem/x509/.key compatible format for FileZilla:
Depending on the circumstance you may need to move install, etc.. your certificate and its private key into an Apache type system. The Digicert Utility has the capability of exporting an installed SSL certificate in the an Apache format.
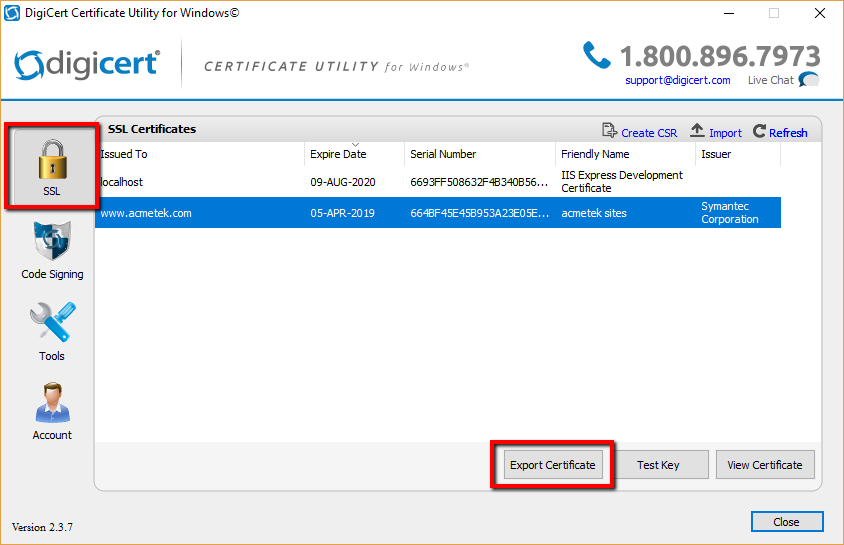
- Run the Digicert Certificate Utility by Double-clicking the DigicertUtil.exe.
- In the Digicert Certificate Utility, Click SSL.
- Select the SSL Certificate that you want to export and then click Export Certificate.
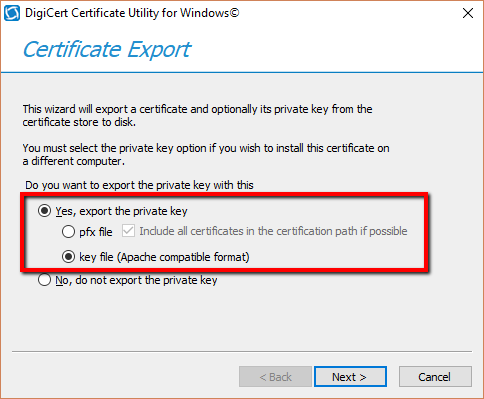
- In the Certificate Export wizard, select Yes, export the private key.
- Select Key file (Apache compatible format).
- Click Next.
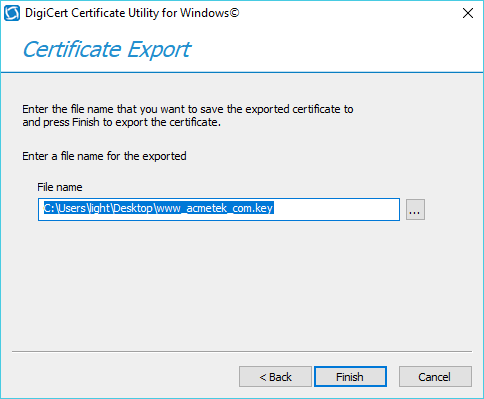
- By default the exported file will be saved to your desktop. otherwise click the … and specify the file name and path you would like to save your file.
- Click Finish.
- You will see at least two files put into the location, name and path you specified to save your exported Apache compatible files.
- name.key: This is your private key file.
- name.crt: This is your SSL Certificate.
- CACert.crt: Any CA intermediate chain trust certificates that went along with your SSL Certificate during its export is put into this file.
- Congrats you know have pem x509 Apache format certificates. With your two – three files you can re-name the or change the extensions of the files as you see fit. Opening the files in notepad will give you a copy paste method to import the certificate into hosting environments or other applicable systems. If you have a system that needs pem simply change the .pem extension of the files by renaming them to .pem. Typically you will leave you.key file as if.
Congrats you have exported your SSL Certificate in pem/x509 format and is ready for the final step in installation into FileZilla.
Installing your SSl Certificate and its Private Key into FileZilla:
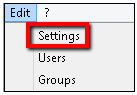
- On your FileZilla server, go to File Zilla Server Options by clicking on Edit > Settings.
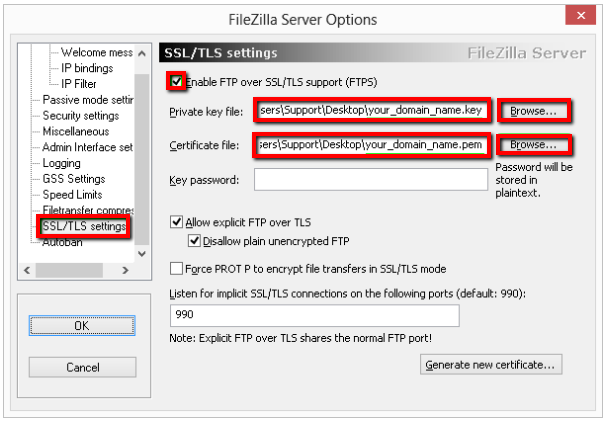
- In the FileZilla Server Options window, in the tree on the left side, select SSL/TLS settings.
- On the right side under SSL/TLS settings, Check Enable FTP over SSL/TLS Support (FTPS).
- In the Private key file field, click Browse to specify the location and path of your private .key file.
- In the Certificate file field, Click Browse to specify the location and path of your SSL certificate. pem file.
Note: If you have no password associated with your private key you can leave this blank. - When you are all finished, click Ok.
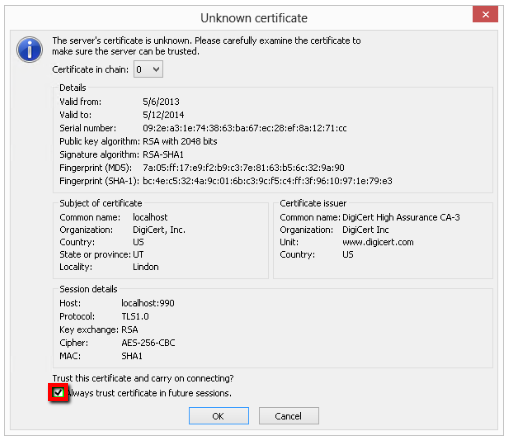
- When you are first making a connection using the FileZilla client, you will be presented with the certificate files from the server. To avoid receiving this prompt in the future, in the Unknown certificate window, check Always trust certificate in future sessions, and then click OK.
Congrats you have set up your FileZilla system to use your SSL Certificate.
If you are unable to use these instructions for your server, Acmetek recommends that you contact either the vendor of your software or the organization that supports it.
FileZilla Support:
For more information refer to FileZilla.